Getting
Started with NFM
Ascendant NFM is very easy to
install, setup, and manage. Below is a quick list of steps to follow
when getting started with NFM.
Step 1 - Install NFM
First, you will need to install the NFM software. Installation
is covered in detail here.
Step 2 - Become Familiarized with the NFM graphical
interface
Second, you may want to become acquainted to the easy-to-use graphical interface
that NFM uses. Please see the Interface Overview documentation for a walkthrough
of NFM's interface.
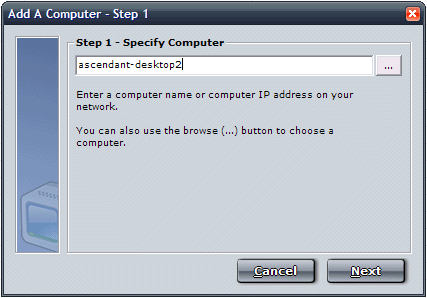
Step 3 - Add Computers to NFM's Computer Monitoring
List
Third, you will need to add computer to NFM's list, as shown
in the wizard below. To add computers please see the Adding
a Computer section.
Step 4 - Specify Startup Settings
Fourth, you will want to access NFM's General Options by clicking on "General
Options" and choose whether you want NFM to load on Windows startup, and
whether you want NFM to start monitoring every time the software is started.
Step 5 - Specify Additional Settings
Fifth, you will want to configure additional settings like File
Archiving, File
Filtering, Log
Delivery, or Email
Alerts, for example.
Step 6 - Start Monitoring
Lastly, you will want to start monitoring and ensure everything
is working properly by clicking on the "Start Monitoring" button.
